

Introduction: Why Soaking Venison Matters
Venison is not only a delicious but also a highly nutritious meat. However, it can sometimes have a strong, gamey taste. Many home cooks often ask: what do you soak a deer roast in before cooking? Consequently, soaking venison in the right solution is essential, as it helps remove excess blood, tenderize the meat, and simultaneously enhance its natural flavors. Whether you’re preparing a venison roast recipe or grilling a juicy steak, the right soak, without a doubt, can make all the difference.
Why Soak Deer Meat Before Cooking?

Unlike beef or pork, venison possesses a unique muscle structure and significantly lower fat content. As a result, it is more prone to drying out during cooking. Therefore, soaking helps in several ways, such as:
- Effectively reducing the gamey flavor by drawing out excess blood.
- Breaking down muscle fibers, ultimately leading to a more tender texture.
- Allowing seasonings to penetrate much deeper into the meat, thereby enhancing flavor.
How Soaking Impacts Tenderness & Flavor
Different soaking methods directly influence the meat’s final taste and texture. Specifically, a good soak can:
- Neutralize strong, iron-like flavors that are often associated with wild game.
- Help retain moisture, thus preventing dryness during roasting.
- Enhance the overall flavor profile by incorporating added herbs and spices.
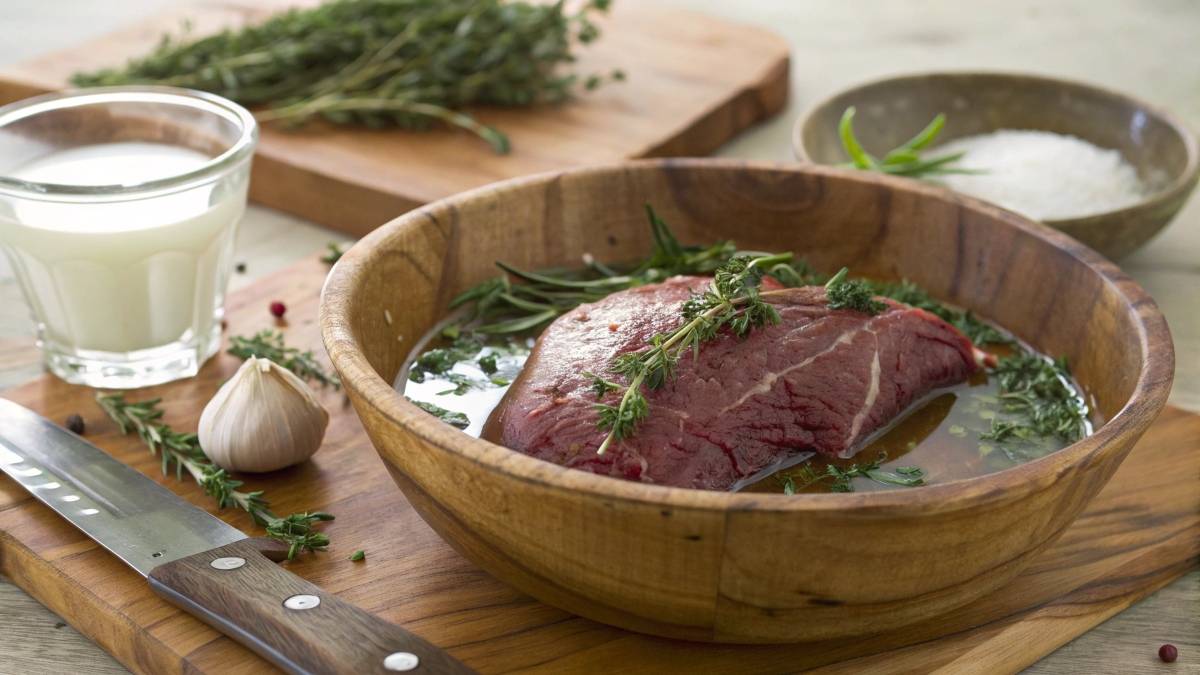
Best Soaking Solutions for Venison
There are several effective soaking solutions for venison. The best option, however, depends on your desired outcome regarding both flavor and texture.
Buttermilk: A Classic Tenderizer
Why it works: Buttermilk contains lactic acid, which gently breaks down muscle fibers, thereby making venison much softer.
How to use: Submerge the deer roast in buttermilk for at least 4 hours or, ideally, overnight for the best results. Then, rinse thoroughly and pat dry before cooking.
Vinegar & Apple Cider Vinegar
Why it works: The acidity of vinegar aids in breaking down tough connective tissues while simultaneously neutralizing strong flavors.
How to use: Mix equal parts water and apple cider vinegar. Next, let the venison soak for approximately 2–4 hours, then drain and season accordingly.
Saltwater Brine: Does It Work?
Why it works: A saltwater soak effectively draws out excess blood, thereby reducing the gamey taste.
How to use: Mix 1/4 cup of salt per quart of water. Subsequently, submerge the venison for approximately 3–6 hours, and then rinse before cooking.
Other Natural Tenderizers: Lemon Juice, Yogurt & More
Citrus juices, such as lemon or lime, effectively break down meat fibers, while yogurt contains natural enzymes that tenderize venison gently.
How to use: Combine lemon juice, yogurt, or even pineapple juice with your favorite seasonings. Then, let the venison soak for approximately 2–6 hours before cooking.
How Long Should You Soak Venison?
The duration of soaking primarily depends on the method you choose:
- Buttermilk: 4–12 hours
- Vinegar solution: 2–4 hours
- Saltwater brine: 3–6 hours
- Yogurt or citrus marinade: 2–6 hours
It is important to avoid soaking for an excessive duration, as acidic solutions can make venison overly mushy.
Common Myths About Soaking Venison
There are numerous misconceptions surrounding the process of soaking venison. Here are a few of the most common ones:
- Myth: “Overnight soaking is always the best option.”
- Truth: Over-marinating in acidic solutions can negatively impact the texture.
- Myth: “Only milk can effectively remove the gamey flavor.”
- Truth: Saltwater, vinegar, and yogurt are equally effective alternatives.
Final Thoughts on Soaking Venison
Soaking venison before cooking, without a doubt, can significantly improve both its texture and taste. Whether you opt for buttermilk, vinegar, or saltwater, the key is finding the method that works best for your recipe. Moreover, if you’re looking for additional cooking tips, be sure to check out how do you cook venison so it’s tender?
Preparing Venison for Soaking
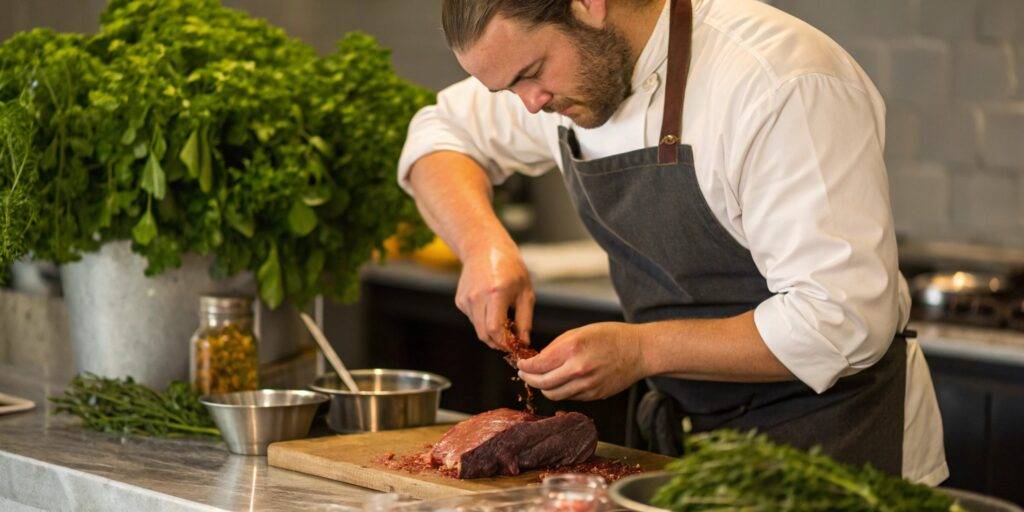
Before soaking your venison, it’s absolutely essential to properly prepare the meat. This not only ensures that the soaking process is effective but also significantly improves tenderness. To achieve the best results, follow these important steps:
- Trim the silver skin: Carefully use a sharp knife to remove the thin, silvery membrane covering the meat, as this can contribute to toughness.
- Rinse and pat dry: Thoroughly rinse the venison under cold water to eliminate any remaining blood. Then, immediately pat it dry using paper towels.
- Cut into manageable pieces: If marinating smaller portions, it is beneficial to cut the roast into thick steaks or chunks to allow for even soaking.
Choosing the Right Container for Marination
The container you use for soaking venison plays a crucial role. Choosing the right option helps evenly distribute the marinade and simultaneously prevents contamination.
- Glass or ceramic bowls: These are the best choices for maintaining flavors while also avoiding reactions with acidic ingredients.
- Ziplock bags: Ideal for ensuring even coverage and significantly reducing air exposure, which enhances marination.
- Avoid metal containers: Reactive metals, particularly aluminum, can alter the taste of venison, resulting in an undesirable flavor.
Step 1: Mixing the Marinade
To achieve the best results, it is crucial to mix your soaking solution thoroughly before adding the venison. A well-balanced marinade generally includes:
- A liquid base: Common options include buttermilk, vinegar, saltwater, or citrus juice, all of which contribute to tenderizing the meat.
- Seasonings: Popular choices include garlic, rosemary, black pepper, thyme, and onion powder, which enhance the overall flavor.
- Optional sweeteners: Ingredients like honey, brown sugar, or maple syrup can be used to add a hint of sweetness and balance acidity.
To ensure the marinade is well-combined, whisk all the ingredients together in a bowl before submerging the meat.
Step 2: Submerging the Venison
Once the marinade is fully prepared, completely immerse the venison in the soaking solution. Make sure that the liquid fully covers the meat. If using a ziplock bag, remove as much air as possible before sealing to maximize the soaking effect.
Step 3: Covering & Refrigerating
To prevent bacteria growth, always soak venison in the refrigerator. Additionally, cover the container with a lid or plastic wrap to lock in flavors and prevent contamination. Importantly, avoid soaking at room temperature, as this can lead to spoilage.
How to Know When Venison is Ready
After soaking, venison should display several key signs indicating that it is properly prepared for cooking:
- A lighter color, especially noticeable if using buttermilk or saltwater.
- A noticeably softer texture, which results from the breakdown of muscle fibers.
- A significantly reduced gamey smell, indicating that excess blood has been removed.
Draining & Patting Dry: Why It’s Essential
Before cooking, it is essential to remove excess marinade by draining and patting the meat dry with paper towels. This step is particularly important because it helps:
- Ensure even browning during the cooking process, which enhances flavor.
- Prevent excessive moisture, as excess liquid can lead to steaming rather than proper searing.
- Allow seasonings to adhere better to the surface, which ultimately improves taste.
Pre-Seasoning After Soaking
Although soaking enhances flavor, venison still benefits from additional seasoning before cooking. Consider using the following options:
- Salt & pepper: These fundamental seasonings effectively enhance the natural flavors of the meat.
- Herbs like thyme, rosemary, and sage: These earthy flavors perfectly complement the rich taste of venison.
- Garlic & onion powder: These seasonings add depth and complexity to the overall flavor profile.
Should You Rinse Venison After Soaking?
Some people prefer rinsing venison after soaking to remove excess marinade, while others believe it is best to retain the absorbed flavors. Here’s what to consider based on your soaking method:
- If using buttermilk: A quick rinse helps remove excess acidity, preventing an overpowering tangy taste.
- If using saltwater: Light rinsing is optional, but regardless, be sure to pat the meat dry thoroughly.
- If using vinegar or citrus: Avoid rinsing, as this can wash away the tenderizing effect and reduce its impact.
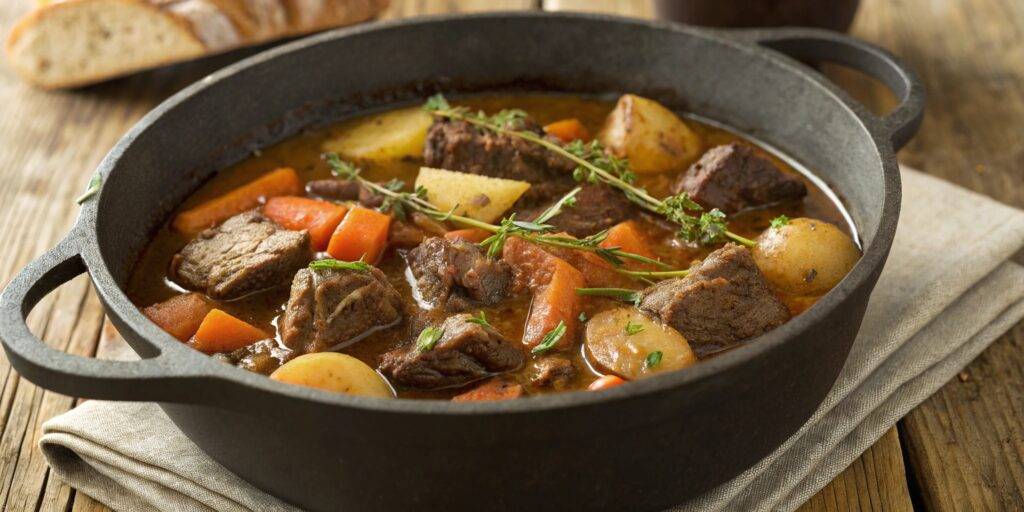
Cooking Methods for Soaked Venison
After soaking, venison can be cooked using a variety of methods. Each method offers unique benefits:
- Slow roasting: This method is ideal for achieving tender and juicy results, as it allows for even cooking.
- Grilling: Best for infusing smoky flavors while simultaneously maintaining a crispy, flavorful exterior.
- Braising: Cooking venison in a flavorful broth ensures deep moisture penetration, resulting in rich, succulent meat.
For more detailed cooking instructions, be sure to check out how long does it take to roast venison?
Adjusting the Soaking Method for Different Cuts
Not all cuts of venison require the same soaking process. Therefore, the method you choose largely depends on the cut’s texture and the intended cooking technique:
- Venison loin & backstrap: These cuts are mildly gamey and benefit from a short soak in buttermilk or vinegar (1–3 hours).
- Venison roast: Larger and tougher cuts require longer soaking times (4–12 hours in saltwater or buttermilk) to enhance tenderness.
- Venison shank: Since this cut is best when slow-cooked, soaking isn’t always necessary, but it can improve overall flavor.
Should You Add Herbs & Spices to the Marinade?
Adding herbs and spices during the soaking process enhances the meat’s flavor without overpowering its natural taste. Some recommended additions include:
- Garlic & onion powder: These ingredients add depth and help balance gamey notes.
- Rosemary & thyme: These classic venison pairings bring out its natural flavors.
- Black pepper & bay leaves: These additions infuse a subtle earthiness into the meat.
For best results, lightly crush fresh herbs before adding them to the soaking solution to release their full flavor.
Using Wine or Beer as a Marinade Base
Some hunters and chefs prefer to soak venison in red wine or beer, as these liquids add bold flavors and work particularly well for slow-cooked dishes.
- Red wine: This option adds richness and pairs exceptionally well with stews and roasts.
- Beer: Mildly acidic, beer is great for tenderizing venison before grilling.
Dairy-Based Marinades vs. Acidic Marinades
Which one should you use—dairy or acidic? The best choice depends on your flavor preference and the desired texture:
- Dairy (buttermilk/yogurt): Offers a milder, creamy texture and effectively neutralizes gamey flavors.
- Acidic (vinegar/lemon juice): Provides a stronger breakdown of muscle fibers but requires a shorter soaking time to avoid over-tenderizing.
How to Balance Flavor Without Overpowering the Meat
Venison has a distinct, rich flavor, so it’s important not to mask it with an overly strong marinade. To achieve the perfect balance, follow these tips:
- Use a 50/50 mix of water and acid (vinegar or citrus) to prevent excessive sourness.
- Add a mild sweetener, such as honey or maple syrup, to balance out the acidity.
- Always adhere to recommended soaking times to avoid breaking down the meat’s texture too much.
Can You Reuse Marinade?
Reusing marinade can be risky since it contains raw meat juices. However, if you want to repurpose it for cooking, take the following precautions:
- Boil the marinade for at least 5 minutes to kill any harmful bacteria.
- Strain the marinade to remove any excess solids before reusing.
- Avoid reusing dairy-based marinades, as they do not reheat well and may curdle.
How to Speed Up the Tenderizing Process
If you’re short on time but still want tender venison, consider these quick methods:
- Pounding with a meat mallet: Helps break down muscle fibers quickly.
- Scoring the meat: Lightly cut crosshatch patterns before soaking to allow the marinade to penetrate faster.
- Using pineapple or papaya juice: These natural fruit enzymes work in under an hour to tenderize venison effectively.
The Best Time to Soak Venison Before Cooking
Timing is crucial when soaking venison. Over-soaking can result in a mushy texture, so follow these general guidelines:
- Quick soaks (1–3 hours): Best for loins and steaks.
- Moderate soaks (4–6 hours): Suitable for roasts and thicker cuts.
- Overnight (8–12 hours): Recommended for particularly tough cuts that need extra tenderizing.
Freezing Marinated Venison: Good or Bad Idea?
Can you freeze venison after soaking? Absolutely, but you need to follow these essential steps:
- Use airtight freezer bags: This prevents freezer burn and helps preserve the venison’s flavor.
- Freeze venison in its marinade for a stronger flavor: This works best if you plan to grill or roast it later.
- Drain and pat dry before freezing: This prevents excess moisture buildup when thawing.
Venison Soaking for Special Recipes
Different dishes require specific soaking techniques to enhance their flavors. Here’s how to tailor your soaking method for various recipes:
- BBQ Venison: Use a marinade with apple cider vinegar and brown sugar to create a tangy-sweet glaze.
- Slow-Cooked Stews: Red wine or beer-based soaks add deep, rich flavors perfect for slow cooking.
- Grilled Venison: Quick marinades with citrus juice and fresh herbs work best to enhance smoky, charred flavors.
For more expert cooking tips, be sure to check out does venison get more tender the longer you cook it?