

Many home cooks and hunters frequently ask: Does venison get more tender the longer you cook it? However, the answer is not as simple as it may seem. Since venison is a lean and muscular meat, it behaves quite differently compared to beef or pork. As a result, certain cooking methods make it incredibly tender, while others can lead to a dry and tough texture. Therefore, let’s explore how both time and temperature influence venison tenderness. 🦌
Understanding Venison Meat Structure

Venison is widely recognized for its lean composition, which means it has significantly less fat and more connective tissue in comparison to beef. Notably, this connective tissue is primarily composed of collagen, which must be broken down through slow cooking to achieve a tender texture. However, if cooked improperly, venison can quickly become dry and chewy instead of tender and juicy.
The Role of Cooking Temperature
The key to achieving tender venison lies in low and slow cooking. Cooking at excessively high heat for an extended period results in rapid moisture loss, ultimately making the meat tough. Instead, maintaining a slow and steady temperature allows collagen to break down into gelatin, which results in a melt-in-your-mouth texture.
Slow Cooking vs. Quick Cooking Methods
- Slow cooking: This method is ideal for tougher cuts, such as the shoulder and shank, using techniques like braising, roasting, and pressure cooking.
- Quick cooking: Works best for more tender cuts, such as backstrap or tenderloin, by employing grilling or pan-searing techniques.
Why Venison Dries Out Quickly
Because venison lacks the intramuscular fat that beef naturally possesses, it dries out quickly when overcooked. Notably, fat plays a crucial role in retaining moisture in meat, and without it, venison requires particularly careful handling. Cooking it beyond medium-rare (135°F or 57°C) often leads to toughness, unless it is slow-cooked with adequate moisture.
How Collagen Breaks Down in Venison
Collagen starts breaking down at 160°F (71°C) and fully dissolves around 180°F (82°C). Consequently, this transformation allows slow-cooked venison to become soft and fork-tender. Therefore, cooking venison for an extended period at lower temperatures helps retain moisture while simultaneously tenderizing the meat.
Comparing Venison to Beef and Pork
Unlike beef and pork, venison contains significantly less marbling (fat within the muscle). Thus, it benefits most from either quick, high-heat cooking (for tender cuts) or long, slow cooking (for tougher cuts). Therefore, treating venison as if it were beef or pork often results in overcooking and excessive dryness.
The Impact of Aging and Marinating
Aging: Properly aged venison naturally becomes more tender due to the enzymatic breakdown of muscle fibers. Consequently, dry aging for 7–14 days enhances its overall texture.
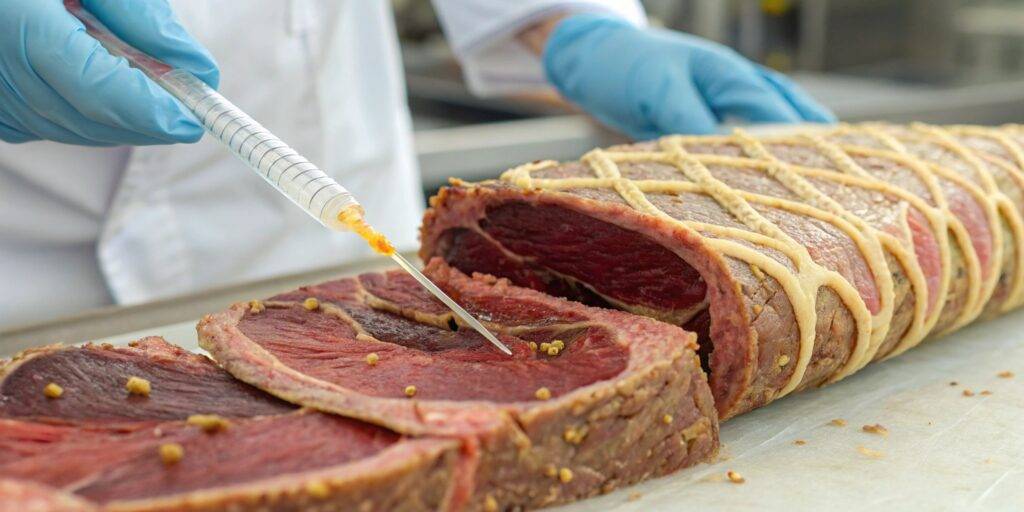
Marinating: Soaking venison in acidic or enzymatic marinades (e.g., vinegar, citrus, or buttermilk) further helps break down muscle fibers and significantly improves tenderness.
Best Cuts of Venison for Tenderness
Not all cuts of venison require slow cooking. Therefore, here’s a breakdown of the best cooking methods for different cuts:
| Venison Cut | Best Cooking Method |
|---|---|
| Backstrap (Loin) | Grilling, pan-searing (medium-rare) |
| Tenderloin | Quick cooking (grilling, searing) |
| Shoulder | Braising, slow roasting |
| Shank | Slow cooking (stews, braising) |
| Neck | Slow cooking, pressure cooking |
Myth vs. Reality: Does Longer Cooking Always Work?
Although low and slow cooking effectively tenderizes tougher cuts, overcooking lean venison can have the opposite effect, making it tough. For instance, if cooking steaks, it’s crucial to avoid prolonged heat exposure. However, if slow-cooking a roast, ensure there’s sufficient moisture to prevent it from drying out.
Pro Tip: Always use a meat thermometer to prevent overcooking. For steaks, aim for an internal temperature of 130–135°F (54–57°C). Meanwhile, for slow-cooked roasts, keep the temperature between 160–180°F (71–82°C).
How to Cook Venison So It’s Tender
Now that we have a better understanding of venison’s structure, let’s explore the most effective cooking methods to achieve tender, juicy results. The key, without a doubt, is selecting the appropriate technique for the specific cut of meat. 🦌
Slow Roasting: The Secret to Tender Venison
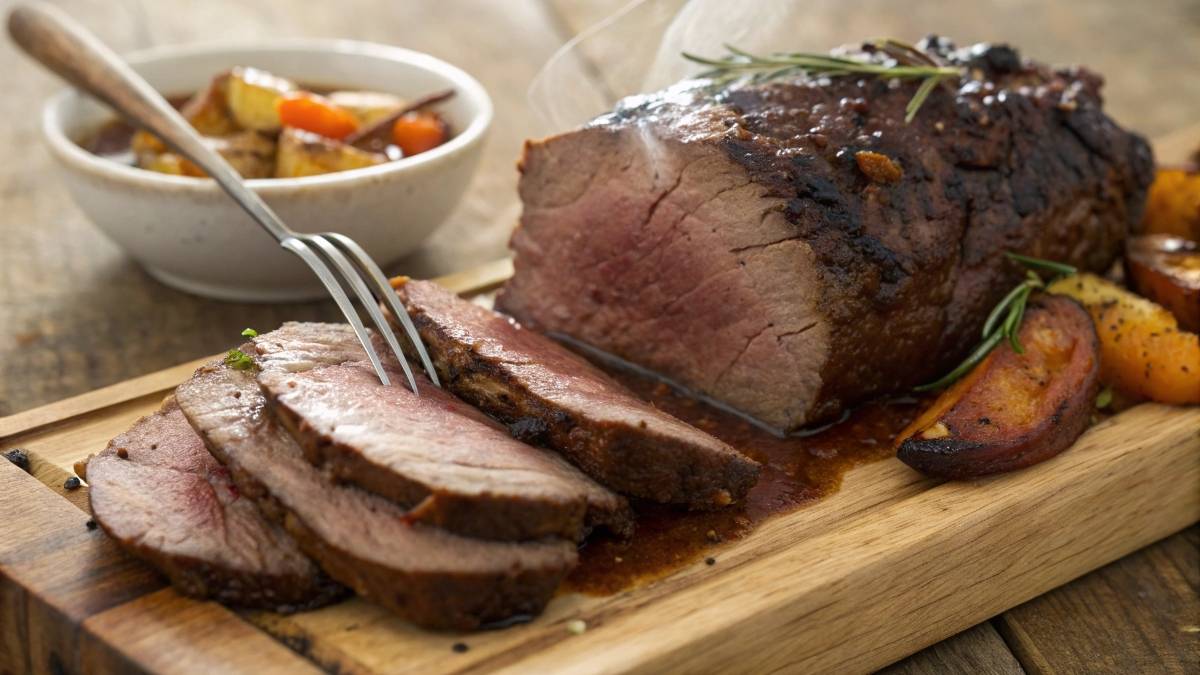
Slow roasting remains one of the best ways to break down connective tissue while ensuring venison remains moist. This method requires cooking the meat at a consistently low temperature (around 275°F to 325°F) for an extended period.
- Best cuts: Shoulder, neck, shank, and roast.
- Optimal temperature: 275–325°F (135–160°C).
- Cooking duration: 2–5 hours, depending on size.
Tip: Regularly basting the roast with broth or drippings throughout cooking significantly enhances moisture retention.
Braising Venison: A Game-Changer for Tough Cuts
Braising is another exceptional method for tenderizing tougher venison cuts. This approach involves searing the meat first and then allowing it to simmer gently in liquid (such as broth, wine, or tomato sauce) over low heat.
Steps for Perfect Braising:
- Season the venison generously with salt, pepper, and spices.
- Heat oil in a Dutch oven and sear the meat on all sides until browned.
- Deglaze the pan using broth or wine to extract rich flavors.
- Add vegetables like onions, carrots, and garlic to enhance taste.
- Cover the pot and allow it to simmer at low heat (around 300°F) for 2–4 hours.
This technique ensures venison becomes fork-tender and infused with deep, savory flavors. 🍷
Using a Pressure Cooker for Quick, Tender Venison
If you’re short on time, a pressure cooker (such as an Instant Pot) offers an efficient way to break down tough venison cuts rapidly.
- Set the pressure cooker to high pressure and cook for 45–90 minutes.
- Incorporate broth, wine, or marinades to maximize tenderness.
- Allow a natural pressure release to retain moisture.
Pressure cooking works exceptionally well for venison stew, shredded venison, or slow-cooked roast.
Grilling vs. Pan-Searing: Which One is Better?
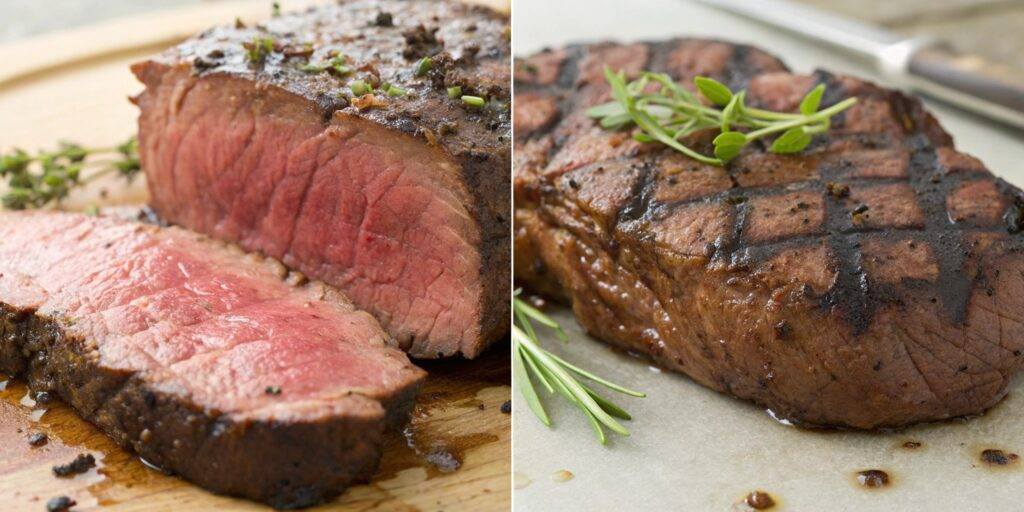
For naturally tender cuts like backstrap or tenderloin, quick cooking methods, such as grilling or pan-searing, yield the best results. These techniques preserve juiciness and help prevent overcooking.
How to Grill Venison to Perfection
Grilling venison is straightforward but demands precise timing:
- Preheat the grill to high heat (400–450°F).
- Lightly oil the meat and season well.
- Sear for 3–5 minutes per side for optimal flavor.
- Check the internal temperature and ensure it reaches 130–135°F (medium-rare).
- Allow the meat to rest for 5–10 minutes before slicing.
🔥 Tip: Always use a meat thermometer to avoid overcooking venison on the grill.
How to Pan-Sear Venison for Maximum Flavor
Pan-searing offers a quick and effective way to cook venison steaks while preserving their tenderness.
- Use a cast iron skillet to ensure even heat distribution.
- Heat the skillet over medium-high and add butter or oil.
- Cook each side for 2–4 minutes to develop a flavorful crust.
- Remove from heat once the internal temperature reaches 130–135°F.
Both grilling and pan-searing effectively lock in flavor while keeping venison tender and delicious.
What Should You Soak a Deer Roast in Before Cooking?
Soaking venison before cooking is an excellent method for reducing gamey flavors while also improving tenderness. The best soaking techniques include:
Vinegar and Citrus Marinades
Acidic marinades help break down muscle fibers and introduce additional moisture.
- Vinegar: Combine apple cider vinegar with water and fresh herbs.
- Lemon juice: Mix with olive oil, garlic, and spices.
- Recommended soaking duration: 4–12 hours.
Dairy-Based Marinades for Extra Tenderness
Dairy products contain enzymes that break down proteins, making venison significantly softer.
- Buttermilk: Effectively reduces gamey taste while adding moisture.
- Yogurt: Tenderizes without overpowering natural flavors.
- Suggested soaking time: 6–24 hours.
Using Enzymes and Natural Tenderizers
Certain fruits, such as pineapple and papaya, contain proteolytic enzymes that effectively break down tough muscle fibers.
- Pineapple juice: Acts as a tenderizer but should be used sparingly.
- Papaya paste: A natural option rich in papain, known for its meat-softening properties.
Warning: Do not soak venison in acidic marinades for excessive periods, as it may result in a mushy texture.
Final Tips for Achieving Tender Venison
- Opt for low heat when cooking tougher cuts.
- Quick-sear tender cuts like backstrap to preserve juiciness.
- Always let venison rest for at least 5–10 minutes after cooking.
- Use a meat thermometer to ensure precise cooking and avoid overcooking.
Pro Tip: Marinate venison overnight in a blend of olive oil, garlic, and fresh herbs to enhance both flavor and tenderness.
How Long Does It Take to Roast Venison?
Roasting venison is undoubtedly one of the best methods to enhance its natural flavors while simultaneously keeping it tender. However, the overall cooking time depends on several factors, including the cut of meat, oven temperature, and desired doneness. 🦌
| Venison Cut | Oven Temperature | Cooking Time | Internal Temperature |
|---|---|---|---|
| Backstrap (Loin) | 400°F (200°C) | 15-20 minutes | 130-135°F (medium-rare) |
| Shoulder Roast | 275°F (135°C) | 3-4 hours | 180°F (fall-apart tender) |
| Venison Leg Roast | 300°F (150°C) | 2-3 hours | 160°F (medium) |
Tip: It is always essential to use a meat thermometer to check the internal temperature for precise accuracy.
Choosing the Right Temperature for Venison
Venison is best enjoyed at medium-rare to medium doneness. Cooking beyond this level often leads to dryness.
- Rare: 120-125°F (49-52°C) – Very soft, almost raw.
- Medium-rare: 130-135°F (54-57°C) – Juicy and tender.
- Medium: 140-145°F (60-63°C) – Slightly firm but still moist.
- Well-done: 160°F+ (71°C+) – Can be dry unless slow-cooked properly.
Letting Venison Rest After Cooking
Allowing venison to rest after cooking is critical for retaining its natural juices. If sliced too soon, the moisture quickly escapes, leading to a dry texture.
Recommended resting times:
- Steaks & Chops: Rest for 5-10 minutes.
- Roasts: Rest for 15-20 minutes, loosely covered with foil.
Pro Tip: Resting venison allows juices to redistribute, making it both moist and flavorful.
Common Mistakes When Cooking Venison
Even experienced cooks can make mistakes when preparing venison. Therefore, here are the most common pitfalls and how to avoid them.
1. Overcooking the Meat
Since venison is lean, overcooking quickly results in dry and tough meat. To prevent this, always use a thermometer and avoid exceeding 135°F for steaks and 180°F for slow-cooked cuts.
2. Not Adding Enough Moisture
Unlike beef, venison requires extra moisture to maintain its tenderness. When roasting or braising, always add:
- Broth or stock: Helps retain moisture.
- Butter or oil: Enhances richness and prevents drying.
- Vegetables: Naturally release water while cooking, keeping the meat moist.
3. Skipping the Marinade
Marinating venison is an effective way to break down muscle fibers while also enhancing its overall flavor. Without marination, venison can sometimes taste gamey and become slightly tough.
Best marinade ingredients:
- Acidic components: Vinegar, citrus juice, or red wine.
- Oils: Olive oil, avocado oil, or butter.
- Seasonings: Garlic, rosemary, black pepper, and thyme.
4. Cooking Cold Venison
Placing venison straight from the fridge onto high heat shocks the muscle fibers, making them contract rapidly and resulting in a tougher texture.
Solution: Allow venison to rest at room temperature for 30-45 minutes before cooking.
5. Not Using a Meat Thermometer
Estimating doneness can easily lead to overcooked or undercooked venison. Using a thermometer ensures perfect results.
Recommended thermometer types:
- Instant-read thermometer (best for steaks).
- Probe thermometer (ideal for roasts).
6. Forgetting to Sear the Meat
Searing venison creates a delicious crust while also locking in natural juices.
How to sear venison properly:
- Use a cast iron skillet for optimal heat retention.
- Heat oil until it is smoking hot before adding the meat.
- Sear each side for 2-3 minutes before finishing in the oven.
Final Expert Tips for Perfectly Tender Venison
- To achieve the best results, always match the cooking method to the venison cut.
- Slow cooking works best for roasts, whereas high heat searing is perfect for steaks.
- Marinades help improve tenderness while also reducing gamey flavors.
- Let the meat rest after cooking to preserve its juices and enhance texture.
Pro Tip: When grilling, brush venison with butter during the final 2 minutes for extra juiciness.
FAQs: Cooking Venison to Perfection
Many home cooks frequently wonder about the most effective ways to prepare venison for a tender and flavorful meal. Therefore, here are the most commonly asked questions along with expert answers to help you master venison cooking. 🦌
1. Does venison get more tender the longer you cook it?
The answer is both yes and no. Slow-cooked venison (such as a venison roast) gradually becomes tender as the collagen breaks down. However, if lean cuts are exposed to high heat for too long, they can quickly become tough and dry.
2. How long does it take to roast venison?
Cooking time varies depending on the cut and oven temperature. For example, a venison roast cooked at 275°F may take 3-4 hours, whereas a tenderloin only requires 15-20 minutes. For precise cooking times, check out our guide on how long to roast venison.
3. What do you soak a deer roast in before cooking?
Soaking venison before cooking helps enhance tenderness while also removing gamey flavors. Some of the best soaking options include:
- Buttermilk: Softens the texture while reducing gamey taste.
- Vinegar: Helps break down muscle fibers for extra tenderness.
- Wine-based marinades: Add depth of flavor while tenderizing the meat.
For a detailed step-by-step guide, visit our article on venison soaking methods.
4. How do you cook venison so it’s tender?
The most effective methods for achieving tender venison include:
- Slow cooking: Ideal for tougher cuts such as the shoulder.
- Braising: Ensures juicy, fall-apart meat by cooking in liquid.
- Quick-searing: Best for tender cuts like backstrap or tenderloin.
To learn more, read our complete guide on how to cook venison for maximum tenderness.
5. What is the best internal temperature for venison?
Venison should always be cooked based on the specific cut to achieve the best texture:
- Steaks & Chops: 130-135°F (medium-rare) for optimal juiciness.
- Roasts: 160-180°F to achieve full tenderness.
To ensure accuracy, always use a meat thermometer for perfect results.
6. Should you let venison rest before slicing?
Absolutely! Allowing venison to rest for 5-15 minutes enables the juices to redistribute throughout the meat, keeping it moist and flavorful.
Pro Tip: Wrap venison in foil while resting to retain warmth and preserve its natural juices.
Final Thoughts: Mastering Venison Cooking
Venison is a lean, nutritious, and delicious protein, but proper cooking techniques are crucial to achieving the best texture and flavor. Here are some key takeaways:
- Slow-cook tougher cuts like the shoulder and neck to break down collagen.
- Quick-sear tender cuts like the backstrap and tenderloin for maximum juiciness.
- Use marinades to improve tenderness while minimizing gamey flavors.
- Monitor internal temperature with a meat thermometer to prevent overcooking.
- Let the meat rest after cooking for the best texture and flavor.
By following these expert techniques, you’ll be able to consistently enjoy perfectly tender venison. Whether you’re preparing a slow-cooked venison roast or looking to master the ideal cooking time for venison, these strategies will ensure success.
Final Pro Tip: If your venison turns out dry, slice it thinly and serve it with a flavorful sauce or gravy to restore moisture.
Ready to Try These Techniques?
Explore our step-by-step guide on cooking venison for the best tenderness and start preparing delicious venison meals like a pro!